
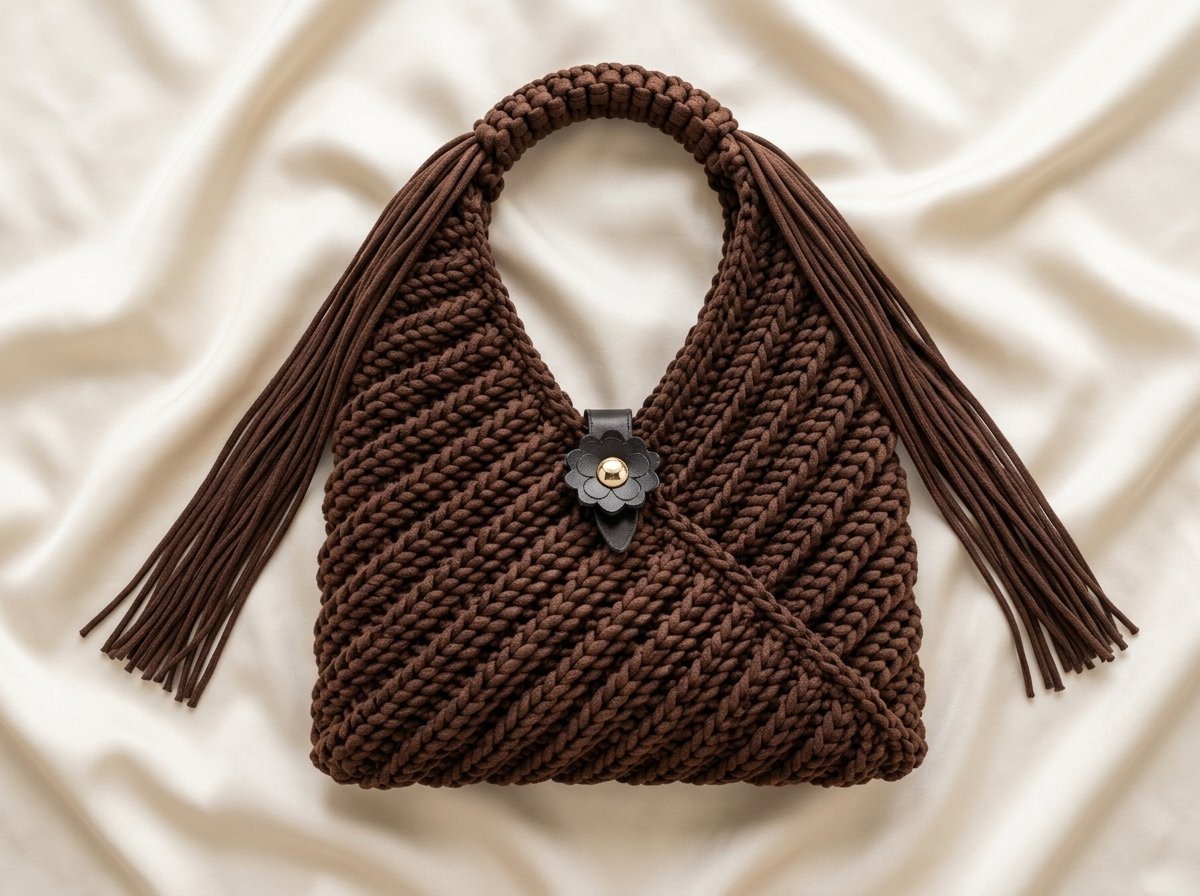
One-Rectangle Origami Crochet Bag with an Adjustable Macramé Strap
The origami crochet bag is an appealing project for anyone who enjoys clever construction without a complicated-looking finish. The tutorial presents a simple rectangle transformed into a sculptural handbag, then paired with an adjustable macramé strap. That combination gives the finished accessory a relaxed handmade character while keeping the overall design practical for everyday use.
What the origami crochet bag looks like
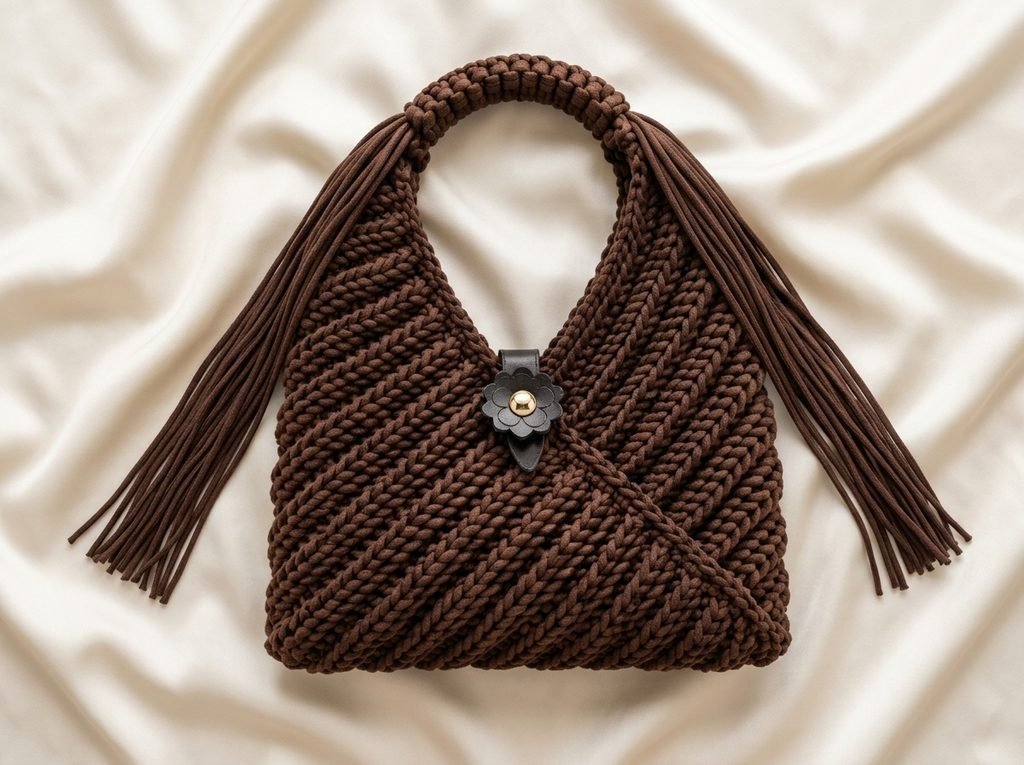
From the finished project shown in the tutorial materials, the bag has a soft, elongated silhouette with a folded, origami-inspired shape. The visible sample is worked in a deep brown shade, which emphasizes the texture and makes the long fringe-like strap especially noticeable. The body appears generously sized for a small handbag, with a rounded upper area and a decorative flower-like fastening detail near the front.
The strap is one of the most distinctive visual features. Rather than a short crocheted handle, the design uses long macramé cords that hang freely at the sides. This creates movement and gives the bag a bohemian feel. Because the strap is described as adjustable, wearers can consider different carrying positions instead of being limited to one fixed drop.
Why this one-rectangle design stands out
The appeal of the origami crochet bag comes from the contrast between its simple starting point and its finished appearance. A flat rectangle can look very ordinary before shaping and folding, yet the completed bag has an architectural profile. That makes it a useful example of how proportion and placement can matter as much as complicated stitchwork.
This approach may also feel less intimidating to crocheters who are still building confidence. The description focuses on making one main rectangular piece rather than managing many separate panels. Even so, the folding stage deserves attention: a small change in alignment can affect the symmetry, opening, and way the sides hang.
Who may enjoy an origami crochet bag?
The origami crochet bag may suit beginners who want a project with a clear visual goal and a satisfying transformation. It can also appeal to experienced crocheters looking for a quick-looking accessory with room for personal style. The finished bag could work as an everyday handbag, a casual summer accessory, or a handmade gift for someone who prefers relaxed, textured pieces.
For makers considering small-batch selling, the design has a recognizable feature that can help distinguish it from a basic rectangular tote. Color changes, strap treatments, and front embellishments could create several variations while preserving the same general concept. Before selling, makers should still confirm their own materials, construction quality, and local labeling requirements.
Planning the origami crochet bag before starting
Begin by thinking about the fabric you want rather than choosing yarn solely by color. A soft, flexible fabric may fold more easily, while a firmer fabric may help the bag hold its shape. Since the verified information does not specify fiber, yarn weight, hook size, or gauge, use the tutorial as the authority for those technical choices and test a small sample if you are unsure.
Color planning can be simple or expressive. A single dark shade creates the cohesive look visible in the sample, while a neutral body with a contrasting macramé strap would make the construction more prominent. Stripes or color blocks may also be attractive, but remember that the rectangular starting piece will be folded. Place intentional color changes with that final orientation in mind.
Set aside time to inspect the rectangle before shaping it. Check whether the edges are reasonably even and whether the fabric lies flat. Uneven edges can become more visible after folding. This is editorial preparation advice rather than a substitute for the creator’s instructions, so follow the tutorial for the exact construction sequence.
What to watch for in the tutorial
When following the origami crochet bag tutorial, pay close attention to how the rectangle is positioned before it becomes a bag. The finished silhouette depends on which edges meet, where the folds sit, and how the sides are secured. If the video moves quickly through a fold or joining point, pause and compare both sides before continuing.
The strap deserves careful observation too. The macramé detail is not merely decorative; it contributes to the bag’s carrying comfort and overall balance. Notice how the adjustable section is arranged, how the cords are grouped, and how the ends are left to create the visible fringe effect. Avoid tightening knots so aggressively that the crocheted body becomes distorted.
The front decoration shown in the sample also changes the character of the piece. It appears flower-like and functions as a focal point near the opening. If your tutorial view does not make its attachment method clear, verify that detail directly rather than assuming the embellishment is structural.
Proportion, finishing, and customization ideas
The proportions of an origami crochet bag can be customized, but changes to the starting rectangle will influence more than height or width. A longer rectangle may create a different fold balance, while a shorter one may reduce the room inside. For a first attempt, staying close to the tutorial’s visual proportions is a sensible way to understand the design.
Strap customization offers an easy way to create a new look. You might use a contrasting color, vary the fringe length, or choose a more restrained finish if you prefer a cleaner style. Keep the attachment points balanced so the bag does not tilt when worn. A decorative flower, button-like accent, or small handcrafted centerpiece can personalize the front, provided it does not interfere with opening and closing.
Before calling the project finished, examine the folded edges and attachment areas from both the inside and outside. Look for loose ends, uneven tension, or places where the strap pulls sharply. Gentle shaping by hand can help the fabric settle, but avoid aggressive pressing or heat unless the yarn’s care instructions clearly allow it.
Troubleshooting and caring for the finished bag
If the origami crochet bag looks lopsided, first place it on a flat surface and check whether the folds are aligned. The issue may be positioning rather than the crochet fabric itself. If the opening feels too tight, review the fold and joining points in the tutorial before remaking the entire rectangle.
A strap that twists or hangs unevenly may need its cords redistributed. Check that the knots are balanced and that both sides carry similar tension. If the bag stretches under its contents, reduce the load and consider using it for lighter everyday items until you understand how the fabric behaves.
Care should follow the yarn label and the finished fabric’s behavior. Store the bag with the strap loosely arranged rather than tightly knotted, and keep heavy objects out when it is not in use. Spot-cleaning may be preferable when the fiber or embellishments are unknown. Let the bag dry in its intended shape instead of hanging it while wet.
Creator
Frequently asked questions
Is the origami crochet bag made from one rectangle?
The supplied description says the main bag is made from one simple rectangle. Follow the tutorial for the exact folding, joining, and strap steps, since those construction details are not reproduced here.
What makes the strap different from a standard crochet handle?
The visible design uses an adjustable macramé-style strap with long hanging cords. This gives the bag a softer, bohemian appearance than a short fixed handle and allows more flexibility in how it is carried.
Can I use different colors for the bag and strap?
Yes, color customization is specifically encouraged in the project description. A contrasting strap can highlight the macramé detail, while a matching palette will keep the finished accessory more unified.
Is this bag suitable for everyday use?
The project is presented as a practical handmade handbag, but its ideal load depends on the fabric, joins, and strap attachment. Test it with lightweight items first and reinforce or adjust the construction only according to guidance you can verify in the tutorial.
How can I keep the origami crochet bag looking balanced?
Check the rectangle’s edges before folding, align both sides carefully, and distribute items evenly when carrying it. These simple habits can help preserve the intended folded silhouette.
A distinctive handmade accessory from a simple start
The origami crochet bag demonstrates how a thoughtful fold and an eye-catching strap can turn a straightforward crocheted rectangle into a memorable accessory. Use the tutorial for the technical sequence, then experiment responsibly with color, embellishment, and strap styling to make the finished bag feel like your own.
Watch the Original Crochet Tutorial
Watch the complete visual demonstration from the original creator below.

Tutorial created by: Make & wonder world
One Comment